Skippy: hey Buzz - sharing a little nugget -
"When working toward the solution of a problem, it always helps if you know the answer."
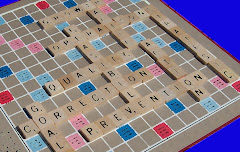
Buzz: "Corollary - Provided, of course, that you know there is a problem."
Sunday, November 7, 2010
Tuesday, June 22, 2010
"Key Plastic Extrusion Indicators"
Skippy – hey Buzz – the hot summer months are finally here. We were involved in a question having to do with “extrusion performance indicators”:
What are your Key Performance Indicators for your plastics production process?
----------------
Buzz – well, here are a few thoughts from a profile extruder's point of view -
First, consider the intended outcome in an environment bounded by these four statements:
a) The extruder is responsible for continuously pumping plastic at a prescribed temperature and pressure
b) The cooling station (water, air, vacuum, etc) is responsible for continuously holding the plastic in the intended shape until cool
c) The take off unit is responsible for continuously pulling the extrudate down line through the "magic foot" represented by the interaction of the extruder and the cooling station
d) The cut off device is responsible for intermittently cutting good parts to length
Skippy – sounds like a pretty simple explanation of “extrusion” –
Buzz – well it is; and for a complex set of interactions, it is often best to “categorize” information in a way that reduces the over all complexity. When it comes time to troubleshoot a problem, for every production related symptom, ask yourself two questions and answer them;
1) which piece(s) of equipment is the one responsible for this condition?
2) What minimum change or correction must be made to achieve maximum desired improvement result?
Buzz - Here’s an example – based on one of our tenets – the greatest good an operator will ever do is to be a great OBSERVER -
The operator reports that he has been making boxes of product for some time now. In the last couple of boxes he has observed the following –
a) the part is still in spec, although he has made some “minor” adjustments to the take off speed
b) the boxes of product all contain the right amount of product and weigh the same as they have been for some time for full cartons – again because the parts are all in spec
c) a box normally takes about 55 minutes to run off –
d) the last box took 65 minutes to complete without a break or any casual loss
What is happening at the line?
Skippy – hmm – well you didn’t mention a cut off device, so we can eliminate that –
Buzz – right
Skippy – the parts are continually in spec, so the “magic foot relationship” is being maintained – it is therefore unlikely that the cooling station is the culprit -
Buzz – right
Skippy – once again, all we sell is time; and it took 10 minutes more to make a box of product
Buzz – yes . . .
Skippy – well the take off is responsible for that line speed and the direct measure of what gets done in a given amount of time in terms of product, so we must have been SLOWING the take off over time –
Buzz – yes right. So what ELSE is going on?
Skippy – well the parts are the right size, and a full box still weighs the same, as we drop the take off speed, therefore the extrusion output must have been dropping over time as well –
Buzz – bingo – and what could be causing that?
Skippy – well a couple of things, but upon a closer inspection at the extruder, it appeared that the pressure was up, the melt was hotter etc, so it was concluded that the screens might be being blocked over time by debris – which was verified during a screen change. After the screen change, the line was brought back up and the proper speed on the takeoff was yielding good boxes again at 55 minutes . . .
Buzz – perfect –
Skippy – but that was so EASY –
Buzz – yes you are correct. Once you categorize your information and step through it logically, things “fall into place pretty easily”. Good work.
This has been working for us for nearly 30 years - the measure of "how well" we are doing (since in the end, all we all sell is TIME) is the number of good units at the correct/reasonable cost produced in that time; insuring both we and our customer profit and continue to exist.
Just our two cents
Skippy and Buzz
Saturday, April 17, 2010
"Bananas and Monkeys"
Skippy - hey Buzz; why does it seem that so many of the questions coming in are more about the myths from the past rather than the facts?
Buzz - well in answer - how about we share this "oldie but goodie" -
"Bananas and Monkeys"
________________________________________
Original source unknown.
________________________________________
Start with a cage containing five monkeys.
Inside the cage, hang a banana on a string and place a set of stairs under it.
Before long, a monkey will go to the stairs and start to climb towards the banana.
As soon as he touches the stairs, spray all of the other monkeys with cold water.
After a while, another monkey makes an attempt with the same result - all the other monkeys are sprayed with cold water.
Pretty soon, when another monkey tries to climb the stairs, the other monkeys will try to prevent it.
Now, put away the cold water. Remove one monkey from the cage and replace it with a new one. The new monkey sees the banana and wants to climb the stairs. To his surprise and horror, all of the other monkeys attack him.
After another attempt and attack, he knows that if he tries to climb the stairs, he will be assaulted.
Next, remove another of the original five monkeys and replace it with a new one. The newcomer goes to the stairs and is attacked. The previous newcomer takes part in the punishment with enthusiasm!
Likewise, replace a third original monkey with a new one, then a fourth, then the fifth. Every time the newest monkey takes to the stairs, he is attacked.
Most of the monkeys that are beating him have no idea why they were not permitted to climb the stairs or why they are participating in the beating of the newest monkey.
After replacing all the original monkeys, none of the remaining monkeys have ever been sprayed with cold water. Nevertheless, no monkey ever again approaches the stairs to try for the banana.
Why not? Because as far as they know "that's the way it's always been done around here."
And that, my friends, is how company policies are made.
Sunday, April 4, 2010
Of Acme Threads and Diamond Dust
Skippy – hey Buzz – it’s finally April – nearing Uncle Sam’s initial harvest date – er um Tax Day -
Buzz – yup; lots of snow in the Northeast really hammered costs, productivity and profitability in February and March. Of course, that will all be just a dull memory by the time the tax implications for that roll around NEXT year –
Skippy – we’ve had some questions coming in across a variety of topics, and thought that this one might be of interest to a number of the new users of the “old timers” tooling systems –
“We have a variety of pipe and profile tools that have been around since the dark ages (60’s and 70’s). Our engineers keep designing around them, but although still ‘functional’, we’re having a lot of trouble getting these tools to seal (leakage) and to come apart at ends of production runs. They have something on them called “Acme threads” and we’re wondering why we are having so many disassembly issues?”
Buzz – ah, Acme Threads – strong ‘translation’ threads that were used to help convey large standardized tooling pieces together to assemble flow paths for polymer. These flow paths were on the way out generally from screw tips and breaker plate areas towards spiders/pins/shells for tubing or profile tooling and or adaptation between the gate and custom die lands. Not only good for tooling assembly back in the day, but known in some circles for generating a fair amount of industrial ‘diamond dust’ as well.
Skippy – ‘translation threads’ and ‘diamond dust’?
Buzz – yes; first, the translation of rotational energy (spinning) into horizontal movement allowed the operator to precisely align precision flatly ground faces or sealing surfaces between two pieces of tooling creating a sealed flow path between the two pieces. By CAREFULLY conveying the two pieces of tooling together until the very flat ground sealing surfaces were touching, the tooling could seal between the two surfaces without having to torque tools together with a variety of bolts.
Skippy – sounds easy enough – what sort of problems are these folks facing?
Buzz- well, by design the Acme threads are perpendicular to the flat sealing surfaces and by nature do require having a small amount of clearance in the threads for things to move smoothly. As with all threaded objects used in heated plastic tooling, a bit of molybdenum disulfide or copper-based 'anti-seizing' compound on the threads is always a good idea. Anyway, to continue, the flat section beyond the threads of the male portion of the tooling must extend further than the receiving flat area near the end of the threads area on the female portion so that the two don’t bottom out on thread early with the sealing surfaces not having coming into contact and creating the seal by touching each other. Also it is a good idea that the outside “corner” intersection be undercut and or knocked off at the outside edges of both the sealing face of the male and female portions. This additional clearance allows the two sealing surfaces to make contact BEFORE the corners can connect or binds up prior to the sealing faces touching (which never should).
Skippy – sort of like in the picture where "A" bottoms out against "B" before we run out of threads to look more like "C"? (Click on the picture for a larger view)

Buzz – yes and note further that when the sealing surfaces need to be “freshened’ by grinding flat again, they have to remain perpendicular to the Acme threads and the same rules to “corner interference” have to be observed.
Skippy – sounds like a robust system of assembly – so what about the “diamond dust”?
Buzz – well, Acme threads aren’t the easiest threads in the world to generate on tooling, and require a fair amount of design planning and tooling execution. These kinds of assembly threads are “designed for the ages” and as such, once successfully implemented are committed to tooling that is going to be around for a long time. Often this tooling is made from materials that will ultimately be hardened and treated to become long lasting tooling. Occasionally the tooling will be hardened almost into “spring steel” to be resilient against plastic and operator maintenance as well as ‘abrasive wear’ -
To continue; try as they might, most extrusion companies utilizing Acme threads aren’t able to avoid some small amount of leakages or incomplete clean ups in tooling over the life of these tools – and plastic (particularly something that will burn and degrade like PVC) eventually finds its way into areas of the tooling in or around the flat sealing surfaces and threads. Sometimes, edges are “shoe-shined” during clean up, sometimes a small leak occurs, and a small amount of PVC will turn to carbon and coat a small area inside the threads or clearances area. It is this small amount of carbon flake that may eventually cause a BIG problem.
Skippy – how can a small flake of carbon cause any trouble?
Buzz – well, remember that the goal of the “sealing surfaces” is to be conveyed towards each other slowly until they are in intimate contact – there is no room left in this impossibly small space left between two surfaces that are “flat” and so, plastic even under pressure takes the easier path out – though the intended flow openings in the tooling – not between the two flat sealing surfaces. However occasionally, a couple of circumstances (read moons coming into alignment) can conspire to create a very unique set of circumstances – and interesting by products -
Say that an operator is extremely busy and hurries the process of assembly – rather than slowly turn the tools sealing surfaces toward each other, they insert a bolt into the portion they will be rotating into place and “spins it up” like starting an old fashioned crank on a Model “T”. Beyond the scope of this discussion, threads are ramps enabling accumulation of leverage – and so as the operator spins the tooling, they are progressively adding energy while increasing the speed of the rotating mass; the heavy metal parts spin faster and faster, gaining inertia . . .
form a picture in your mind now, that at the same time, a small flake of carbon, previously hanging innocuously in a corner of the tooling, falls down between the quickly approaching impossibly flat sealing surfaces – and suddenly the moment of ‘impact' occurs.
Skippy – what happens in those milliseconds?
Buzz – well – huge torque is going to be applied from the accumulated inertial mass in the rotating piece. This is applied to the impossibly flat surfaces with a small piece of carbon trapped in between. As the crushing pressure of the accumulated spinning mass begins to focus in the single point of contact represented by the carbon, the carbon begins to be squeezed and smeared. The torque continues to carry the moving tool forward towards having the sealing faces touch, and yet, we still have inertia tearing forward with energy having yet to be expended and absorbed. The carbon, which by now has been transformed into a low quality industrial diamond, is now caught between the face and is continuing to be pushed and ground inexorably onward by forces in the rotating “spring steel” still hurtling forward. The diamond dust is harder than the steel, and as such is encouraged by the onslaught to plough into the steel faces, displacing steel material to the sides and perhaps behind it as it is gouged further and further into the seal face(s). Eventually the spring rebounds, but with not enough force to unlock, having spent some energy during the diamond formation phase, and rebounds back, and then forward again, back and forth like a SlinkyTM until finally coming to rest. Again, all this happens in only a fraction of a second . . .
Skippy – and so here we are with the two faces perhaps near enough but not really touching each other as intended with a small bit of diamond dust, ground like a fallen meteor skipping across a Kansas corn field embedded in one or both of the faces?
Buzz – you’ve got it. Sadly, the damage billing isn’t ready for final tally yet – eventually, we have to take the tooling apart, and it is going to take Herculean effort – not to mention a huge “cheater bar”, perhaps our burliest operator and a heat source to get the steel spring twisted enough toward “off” to encourage the spring to back away by crushing AGAIN over the diamond dust as it is unwound – it is not uncommon during the disassembly to find plastic leakage, and perhaps even MORE carbon trapped in the tooling against the next assembly.
Skippy – the tooling will have to be cleaned up again, and the sealing surfaces are likely to require grinding and lapping to be brought back to “flat and perpendicular” again as well –
Buzz – yes – most houses go through much of this process, without really even realizing it has been going on – you can bet that when you walk into an extruder and look at the sealing surfaces on Acme threaded assemblies and see ‘eyebrows’ gouged into the faces – diamond dust was being made along with plastic parts – and not of much positive value at all . . .
Just our two cents –
Skippy and Buzz
Saturday, February 13, 2010
SNOW
[shhhshkkt]
[flump]
[shhhshkkt]
[flump]
[shhhshkkt]
[flump]
Skippy: - sorry for the delay on our next posting - we've had about 45 inches of snow over the last 14 days after a couple of trips out to important industry shows in Atlantic City and Atlanta -
Buzz: - right; but the good news is that we're getting good "mileage" on the snow blower -
Hope to be back soon with our next article - hopefully this weekend -
Skippy and Buzzz
[flump]
[shhhshkkt]
[flump]
[shhhshkkt]
[flump]
Skippy: - sorry for the delay on our next posting - we've had about 45 inches of snow over the last 14 days after a couple of trips out to important industry shows in Atlantic City and Atlanta -
Buzz: - right; but the good news is that we're getting good "mileage" on the snow blower -
Hope to be back soon with our next article - hopefully this weekend -
Skippy and Buzzz
Sunday, January 24, 2010
Drop Test on PVC Profiles
Skippy - hey Buzz - here is another typical extrusion scenerio -
“Using ASTM D4495 to test rigid PVC profiles from extrusion. The problem I’m having is that very few of the profiles are failing . . .
The standard calls for room temperature conditioning, and when a 10 lb weight strikes the profiles, even from a height of 30 inches, no damage is done as far as failure, denting yes, no cracking . . .
I’ve even increased the weight to 14lbs and nothing. Any ideas”
Buzz - As the standard points out
(http://www.astm.org/Standards/D4495.htm),
results obtained by use of this test method can be used in two ways:
a) As the basis for establishing impact-test requirements in product standards, and or
b) To measure the effect of changes in materials or processing.
Skippy - isn't drop dart impact testing by profile extrusion houses done in foot pounds per mil (so two different wall thickness samples from the same materials would be subjected to different pass/fail drop heights/weights but the same overall criteria?)
Buzz - yes and is used to determine the limits of acceptable ductile or brittle failure modes - mention made above is that "only a few are failing". Actually at the maximum for acceptable failure mode - none should fail - perhaps the testing is at too high a standard to be appropriate (just beyond what would be "acceptable") or the testing isn't destructive enough if you are hoping for failure more often or every time?
Skippy - Additional questions requiring study come to mind given the presented information
- Are you testing for ductile or brittle failure
- is your calculation for inches of height per pound correct
- how long is the product resting between production time and testing
- would the application benefit or call for an annealing process involved to relax stress
- how thick is the product in mils
- what tup shape are you using
- etc
Buzz - Perhaps just as important, after the drop dart testing, are you giving it a more "real life" type 'whammo' testing - the kind of test when a worker punches through it with a nail, or drops it from the truck, or off a roof, in hot and more importantly cold weather; etc?
Also, we are assuming that dimensions and aesthetics are acceptable and accounted for in the testing at current (measured and reproducable) run conditions - aka you should be doing this testing to failure on parts that are in all other ways acceptable - if not, when or as you make additional changes, your test results may be suspect or worse, value-less.
Just our two cents -
Skippy and Buzz
Sunday, January 17, 2010
Extrusion of PETG - more thoughts
Skippy - hey Buzz - we never did actually give a "heat profile" to start up the PETG in the last discussion -
Buzz - yes, correct. Why? Well, mostly to see if these comments were helpful in the event that they did in fact have a start profile capable of
a) getting melt to the tooling and
b) keeping a steady state melt coming
No mention of the current melt temperature or current heat profiles or equipment, rates, tooling etc was given, (we are also assuming that adequate drying was in fact occuring) and PETG doesn't have too much in the way of "hot guts" anyway -
Skippy: so we pulled up a little short in the actual "heat profile" part of the answer on purpose since they didn't mention the equipment, screw/barrel etc being used. Suffice it to say that achieving the recommended melt temperature on heated (and controlled heating) screws and tooling is necessary; more information is required to make a more specific recommendation.
Buzz: Yes, much will depend on the screw length/diameter and screw design and intended rates and draw-down. The first couple of zones can be used to keep the melt cooler (but this again depends on screw design) and it is generally wise to keep barrel cooling OFF during start up to avoid freezing material along the screw and creating melt blockages.
Skippy: Typically, processors successful at extruding tubing and profiles from PETG use an "efficient" screw design to keep the melt and unmelt seperate until near the end of the transition area - particularly with thin re-granulated clean dry scrap. And generally (as indicated by Eastman) high compression screws like those designed for HDPE will generally not be suitable for PETG copolyester since excessive melt temperature and poor melt strength usually result -
Just our two cents
Skippy and Buzz
Wednesday, January 6, 2010
PETG tubing question
Skippy: Hey Buzz; Happy 2010!
Buzz: Howdy Skip - same to you. Glad to get 2009 behind us and start moving forward again -
Skippy: - right. To kick off the year - how about a quick processing question - the material? PETG or glycol modified PET for us extruders -
The question goes:
"Can anyone recommend a heat profile for extruding a PETG Tube 3" in Dia with a wall of 1 mm? Experiencing too much sag between the Die and the water tank in a vac sizer."
Buzz: the real answer of course is a heat profile that yields the correct clarity, and the least adhesive version of the material with the most hot guts you can get. This would of course also have to take into account the type of screw, compression, screens, tooling die pressure drop and other items. Not to mention that a heat profile while extruding at rate may or may not be the same as during string up, etc etc etc -
Skippy - well, yes, hopefully a dialog will ensue that will prompt a few more details. Do we have any thoughts that we can share assuming that the heat profile that is being used now is correct (and it just seems too hard to handle?)
Buzz: - you bet - although we can not be sure by the question as asked is whether we are asking in this way due to a surface issue, control of ovality or inability to string up. Will assume the worst -
There are a couple of more important questions for glycol modified PET -
1) What is the DRAW DOWN of the material - draw down orientation can be very useful; we used to produce our tooling approximately 50-80% greater than the size of the drawn down part for 'some' dependable orientation between the pin/shell and the calibration kiss.
2) Do you have an open air passage to the inside of the tube through the pins (perhaps through one or more spider legs) to allow air pressure inside the tube as you string it up?
3) is your tank in a position to give you the best shot at string up and running? Normally, you have the tank on center line in both plan and elevation to balance out "kiss", but this material is ADHESIVE versus just COHESIVE at correct melt temperature, so the KISS has to be at the last possible instant - you can’t just rub it all over and around the entrance of the sizing; it will want to set up too quickly, so you need a fair amount of draw down.
4) What is the nature of your calibration design - wafers, solid sleeve, rifled sleeve etc. as well as the surface texture - smooth, glass beaded, chromed etc.
Skippy: What about this "sag" business?
Buzz: At the same time as you are drawing down, the tube is wanting to "sag" due to gravity; recognizing, planning and depending on the "sag" that you mention for good clarity can be advantageous - so for this reason, the vacuum sizing tank as a whole is inline from a plan and elevation view as well as level for start up but after the string up, you will run it LOWER (still level; drop BOTH ends) than the die and backed away to point that still allows a kiss, but minimal contact prior to going down the "barrel" of the tubing calibration unit - and the tube does some controlled "sagging" as it falls from the die face down to a lower level calibration entrance level, then is pulled in evenly into the calibration unit.
Skippy - Cool; any more pointers?
Buzz: Assuming you are using a vacuum tank, I prefer a vacuum chamber that is 2' or less to get the line up into a tube quickly. Mount a fogging sprayer in the lid of the tank that can be used to spray the material with a mist of water (which will harden it pretty quickly at low speeds). You use this during the vacuum chamber sealing and water fill, then turn it off once a regular vacuum is achieved.
Skippy: What about gasketing?
Buzz: Be sure to have an adequate seal at the down stream exit of the vacuum chamber - one sealing material preferred is a silicone rubber (smooth orange) that is pretty friendly to sticky PETG. Use a few test swatches - you are looking for a supple material that will stretch to seal off as pulled downstream but doesn't stick and release. In general, the gasket material might ben1/8" thick and cut about 1/4-3/8" smaller on center than the OD of the final tube depending on suppleness. It is extremely important to cut the inside circle of the gasket on center with the supports and the tube itself. The seal material should be supported on BOTH sides of the seal with semi rigid to hard supports. The UPSTREAM support ring should be the OD of the tube plus a smidgeon (maybe 1/8" but not more than one thickness of the seal material larger than the final tube OD). Not larger than one times the thickness of the seal material, or the seal can be sucked upstream through the support easily. The DOWNSTREAM support ring should be the OD of the tube Plus 3 times the thickness of the seal material and a smidgeon more, so as not to be pinched too tightly by the tube when it is pulled round and the friction between it and the tube pulls it evenly down stream to minimize drag/release marks.
Skippy - gee the gasket and tube sealing technique described there sounds like a good practice on just about any tubing -
Buzz - Right!
In addition, you will need cooling that is MEASUREABLE in gallons per minute depending on line speed and calibration design for duplication in the future (see another post about water use across a plant), and a water level that has the cooling around the calibration deep enough to prevent air being cavitated into the cooling stream turbulence.
At string up, use a bit of silicone mold release on the shell and pin face that is clean to avoid material sticking to these surfaces and melting into "drool". Try to control your pin/shell temperatures to the extent that you can cool down the shell slightly to below the melt temperature which will result in a duller looking matte surface (melt fracture as the material slows down at the wall) at string up. This will give you a little more in the way of "hot guts" with a material that is very soupy at melt. When the Shell is a bit colder than the Pin, the material will bloom AWAY from the pin face once trimmed off. Spray a bit of silicone mold release on the pin face, then work to string up the line through the calibrator and avoiding touching the die face with the PETG as you pull it into the calibration towards the take off. Some of the sticky material may have stuck to the Shell face during the bloom once you get the line strung, you can scrape the face of the shell as necessary to clean up any material (being careful not to cut the material off the pin etc).
Skippy - is it hard to handle down line towards the take off?
Buzz: Once you are pulling the material down line, twist the material as you pull it into a 'rope" in water that has been brought up to the bottom edge of the calibration. The transition point is so abrupt that it will harden very quickly at this point; the twisting into the rope keeps it straight -
This next part is a little tricky - it takes a time or two to get the hang of it; read and visualize it a couple times before trials:
Once in the take off, you need to seal up the vacuum chamber -
a) move the tank forward to an adequate "kiss point", and
b) will open the drain to the chamber slightly (only a crack - this will help prevent pulling too much vacuum too quickly) and you
c) will apply vacuum to the calibration chamber, while you
d) turn the water misting/fogger lightly on (don't blow it out the face of the die) to set the tubing up as a "tube" while you simultaneously use a wet rag in the exit side seal area to "seal" the vacuum chamber around the rope until the "tube" arrives and is sealed with the gasketing. You do turn on the general fill water to be bring up the water level as well - just enough to fill but not flood out the front and hit the die - the light vacuum being maintained with the wet rag at the back and the drain cracked should allow you to make a "tube" in the sizer and keep water from going forward to the die -
Skippy: So . . . you want to be pulling enough vacuum to encourage the air pressure in the tube to expand it to fill the calibration unit and be raising the general water level to coincide with covering the tube when the mostly filled tube gets to the rear seal. Once you have good vacuum and the tube covered, close off the drain, bring your water level on up and level out your vacuum in the chamber?
Buzz: Perfect! Get things up to rate, drop your tank slightly and move the kiss back to a sweet spot and run with it.
These thoughts should get you up and running - good luck.
Just our two cents -
Skippy and Buzz
Subscribe to:
Posts (Atom)